
New build for street/track... LS1 S14

Thread Starter
Registered member
Joined: Nov 2009
Posts: 147
Likes: 0

Thread Starter
Registered member
Joined: Nov 2009
Posts: 147
Likes: 0
Some updates:
My new Rad came in (Koyo for KA). Fits like it should.

-------------------------------------
since I am lowering the car, I needed to move the wire harness that runs inside the driver side fender.
I removed the fender got rid of the white and black harness holder thingies, hammered as seen in the third pic. I used one hole already there and drilled a hole to attach with zip ties above the ridge. I ran the hood latch cable inside the engine bay through the triangle hole near firewall and along the frame rail.

-----------------------------------------------
I also ran my fuel system using the corvette filter regulator (Wix from Rock Auto). I had to change the configuration of the mounting bracket and used a self tapper to attach under the frame rail.


I used Russell adapter fitting: RUS-640940

I cut down the ends on the filter/regulator and used the factory return line and a new feed that was the perfect size. I removed the hardlines and ran -6AN line up to engine bay. I used heater line with a slit to cover the braided line where it comes in contact with the fuel tank, as not to rupture it.


I will use some heat sleeve where it comes by the header and this fitting to attach to fuel rail: RUS-640853

My new Rad came in (Koyo for KA). Fits like it should.
-------------------------------------
since I am lowering the car, I needed to move the wire harness that runs inside the driver side fender.
I removed the fender got rid of the white and black harness holder thingies, hammered as seen in the third pic. I used one hole already there and drilled a hole to attach with zip ties above the ridge. I ran the hood latch cable inside the engine bay through the triangle hole near firewall and along the frame rail.
-----------------------------------------------
I also ran my fuel system using the corvette filter regulator (Wix from Rock Auto). I had to change the configuration of the mounting bracket and used a self tapper to attach under the frame rail.
I used Russell adapter fitting: RUS-640940
I cut down the ends on the filter/regulator and used the factory return line and a new feed that was the perfect size. I removed the hardlines and ran -6AN line up to engine bay. I used heater line with a slit to cover the braided line where it comes in contact with the fuel tank, as not to rupture it.
I will use some heat sleeve where it comes by the header and this fitting to attach to fuel rail: RUS-640853
Last edited by Driver; Feb 20, 2011 at 02:06 PM.
Thread Starter
Registered member
Joined: Nov 2009
Posts: 147
Likes: 0
I got rid of the charcoal filter box crap at passenger quarter panel and just used the vent line to a small filter and clamped up out of the way.
Last edited by Driver; Feb 20, 2011 at 02:15 PM.


Thread Starter
Registered member
Joined: Nov 2009
Posts: 147
Likes: 0
I bought 20' and will just use the extra for my power steering lines. I'd say the line form the filter to the fuel rail will be around 13'-14'.
Last edited by Driver; May 11, 2010 at 02:04 PM.
Thread Starter
Registered member
Joined: Nov 2009
Posts: 147
Likes: 0
New Fueled Performance motor and trans mount kit came in. Looks great!!
http://www.fueledracing.com/

Oil pan and drive shaft should be here tomorrow. Headers are being jet hot coated now and I should have an a week or two.
http://www.fueledracing.com/
Oil pan and drive shaft should be here tomorrow. Headers are being jet hot coated now and I should have an a week or two.
Last edited by Driver; Feb 20, 2011 at 02:19 PM.
Thread Starter
Registered member
Joined: Nov 2009
Posts: 147
Likes: 0
I cut off the brake dust covers but was sure to leave tabs that I will later use to attach brake ducts to.

Installed some front suspension pieces.

Installed some front suspension pieces.
Last edited by Driver; Feb 20, 2011 at 02:25 PM.
Thread Starter
Registered member
Joined: Nov 2009
Posts: 147
Likes: 0
Thread Starter
Registered member
Joined: Nov 2009
Posts: 147
Likes: 0
I finished the conversion from auto to 6 speed. I took the dash out to get the pedals in and cut the hole for the clutch master cylinder.


Parts used for clutch master to slave:
Wilwood CMC. Part # 260-1304

Fitting into Slave, Russell Part # 640281
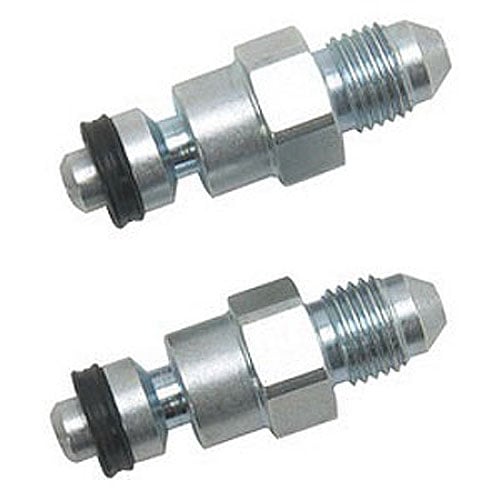
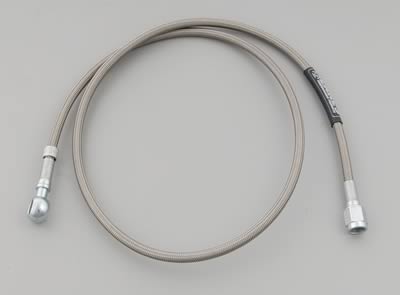
Clutch line, Earls Part # 63010236ERL
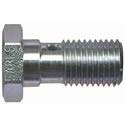
Banjo bolt, Earls Part # 997503ERL
I installed the Max rear sub frame aluminum collar/shims. After looking into this further I wish I had bought Stance because I machined out the Max to look like the Stance because the stock bushimgs interfeared with the Max items.


Put the Fueled Racing oil pan on. It came with a custom pickup and stud kit. Notice the trap doors to keep the oil where it belongs.


Motor and trans ready to go into car.

Dropped the motor in.


Took the motor back out after test fitting the headers and making a list of things to do when the before the motor goes back in for the final time.
I started by taking out the AC evap and making these plates to cover the holes.
I also put some fire sleeve over the fuel line after seeing how close the header on that side will be.
I am also in the process of trading all my Vette accessories for 98-02 Camaro accessories because my intake has no room with where the Vette PS res mount.
Parts used for clutch master to slave:
Wilwood CMC. Part # 260-1304
Fitting into Slave, Russell Part # 640281
Clutch line, Earls Part # 63010236ERL
Banjo bolt, Earls Part # 997503ERL
I installed the Max rear sub frame aluminum collar/shims. After looking into this further I wish I had bought Stance because I machined out the Max to look like the Stance because the stock bushimgs interfeared with the Max items.
Put the Fueled Racing oil pan on. It came with a custom pickup and stud kit. Notice the trap doors to keep the oil where it belongs.
Motor and trans ready to go into car.
Dropped the motor in.
Took the motor back out after test fitting the headers and making a list of things to do when the before the motor goes back in for the final time.
I started by taking out the AC evap and making these plates to cover the holes.
I also put some fire sleeve over the fuel line after seeing how close the header on that side will be.
I am also in the process of trading all my Vette accessories for 98-02 Camaro accessories because my intake has no room with where the Vette PS res mount.
Last edited by Driver; Feb 20, 2011 at 02:47 PM.